
Finishing up a cross stitch bookmark

First of all, finger press in about an inch (up to 3cm) of waste fabric at each end of the design. Make sure that the two ends are equal on the front (assuming that's the effect you want to create, of course!)

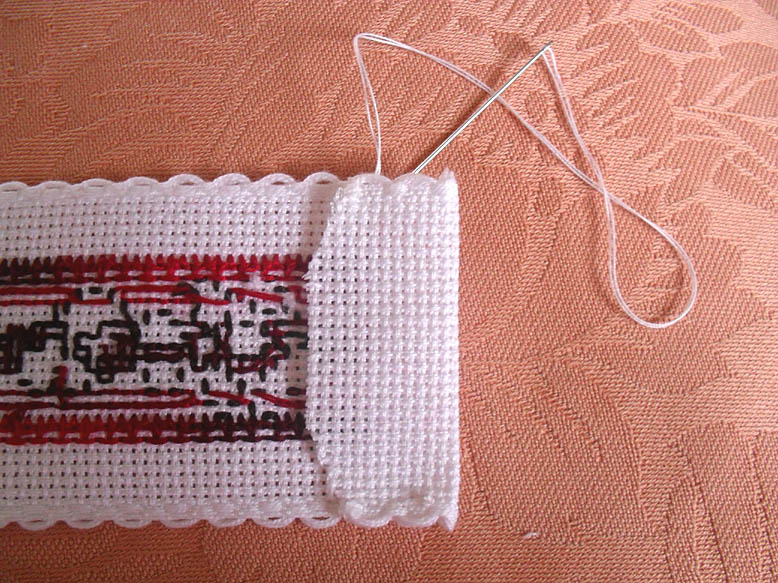
 Using a sewing thread that matches your Aida band colour as closely as you can manage, make a few discreet stitches along the outside edge. Try to make them between the insides of the two edges so that the stitches don't show on the front. You can do this by catching the long stitches on the inner edge of the Aida band and joining them together.
There's no need to make any stitches along the straight edge and it's often better not to so as not to risk anything showing. Also, the edge of the fabric will almost certainly fray, so stitches are no real use here.
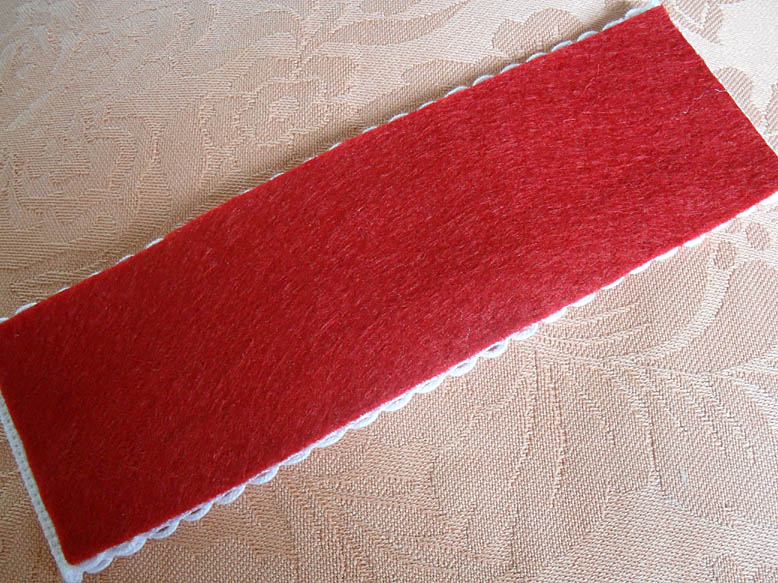
Still using the thread that matches the Aida band (in case you slip up and sew through, although you could use one that matches the felt instead, if you preferred), sew the two pieces together, again taking care to catch the long stitches on the band so that they don't show on the front. And here's the (back of) the finished item:

I hope that's been useful! If you use this tute (or part of it), please leave a link in the comments section to where we can admire a photo of your lovely new bookmark.=)
Text and images © Elizabeth Braun 2013
Labels:
Bookmarks,
Cross Stitch,
Tutorials
![]()


12 comments:
Very clear, Elizabeth. I would only add - as a book lover - you want a dense but fine felt, so as not to end up with a bookmark that is too thick and might damage the spine of the book.
And I congratulate you on spelling "discreet" correctly for your context. It's one of my pet peeves that people get that one wrong and it always takes me an extra second to work out what they mean!
I always struggle with finishing things neatly. I'm making a corset for a class at the moment, and the technical side has all gone well, but now I have to finish it which I'm slightly dreading!
Your bookmarks are lovely :)
OMG! I'm so glad to find these details!! Thank you! My book mark is finishing perfectly. The directions that came with the kit were not clear at all.
Hello I was so pleased to find your page on finishing a Bookmark . I am a Volunteer Grannie at my Grandaughters village school .
I have a lunch time Embroidery class with a few 6,7 and 8 year old s and have been asked to do some Cross Stitch with a class of 6 and 7 year olds as part of their Victorian project . The Only bit I was worried about was the finishing but after reading your instructions I feel confident we can complete the task .
Thank you
Jan Walker
Derbyshire
I haven't done any cross-stitching in about ten years and was really fuzzy on how to finish bookmarks. Thanks for instructions that seem to be very easy with a beautiful product!
I fortunately found your instructions on how to finish a bookmark on Aida band. I had some unfinished bookmarks done that I didn't know how to finish, so your very clear instructions are a big help to me. Thanks so much!
Barbara Thank you so much for your very clear and easy instructions on how to finish an aids band bookmark
thanks Heavens I found this! there were NO instructions on my bookmark kit on how to finish it and I was stumped! This is just what I was looking for, thank you!
that was exactly the help i was looking for. very clear instructions and i am now finished and love the end results. thank you so much.......
Πολύ σαφείς οδηγίες ευχαριστώ !!!!
Muchas gracias por toda la información
I use the blanket stitch and thread as near the color of the felt as possible. You can also do a back stitch around edge to anchor your blanket stitch to. My bookmarks have turned out very well since I started doing this.
Post a Comment