
Wired fabric elements for stumpwork
Today I want to share a short tutorial detailing my method for making wired fabric elements for raised embroideries (stumpwork). It may differ in some parts from other instructions that you may come across. That's fine - there's rarely only one correct way to do these things and please feel free to work in the way that best suits you, your materials and your design.
A wired fabric-based element is a detached piece that you want to attach to the main design whislt including the fabric the element has been stitched on. This is in contrast to wired needlelace shapes, which are worked on a fabric pad, then totally removed from it. Here, the fabric is part and parcel of the shape you want to create and so the method is a little different. This tutorial doesn't spend much time on embroidery stitches, but it focuses mainly on the wiring and preparing of the detached element.
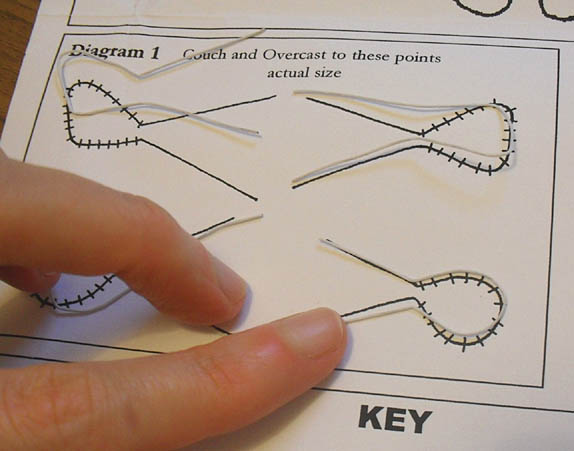
First of all, you need to cut and bend your wire to shape. Stumpwork wire bends easily, so you won't need any special tools to do this. Having said that, don't use your normal embroidery scissors to cut the wire - use wire cutters or, as I do, specially toughened goldwork scissors which were made for cutting metallic wires and threads.
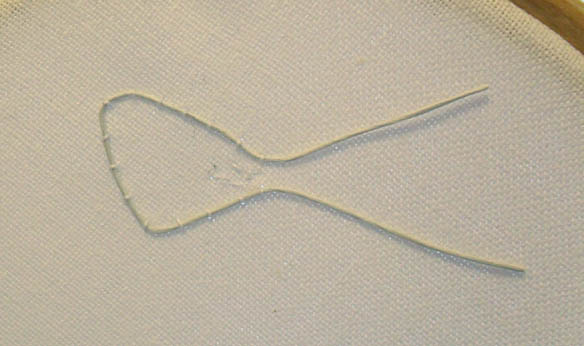
Mount a piece of fabric into a small hoop and couch the wire shape in place using a thread that will not show against the colour you choose for your outermost layer. It's also worth working on the nearest colour plain dyed fabric you have to that shade too so that fewer cut ends of fabric show when you get to later stages. I say plain dyed fabric as, if it is only painted or printed, the chances are that the middles of each actual fabric thread may not have taken much (or any) of the colour and may show up white. In this case, I needed white, but often you will want something else.
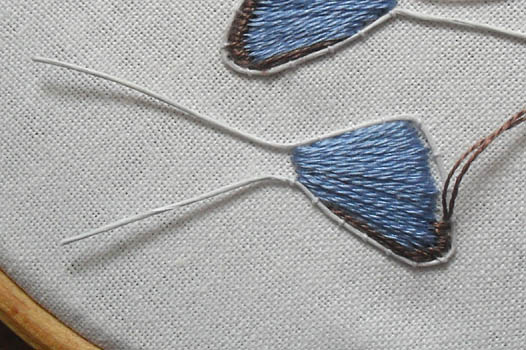
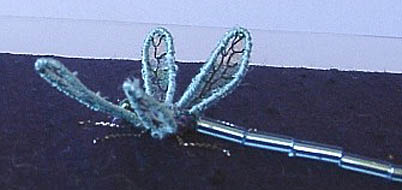
Fill in with your choice of embroidery stitches, picking colours, threads and textures that are best suited to your design. With some fabrics, you may want to minimise or even totally skip this step as you may want the fabric itself to show up clearly with no stitching, or just with some minor decorations such as leaf or wing veins (for dragonflies, for example) and this style seems to be gaining in popularity, possibly owing to speed!!
Once the shape is essentially full of as much stitching as you need, then you need to stitch the whole element securely together. Some like to do this part first, before filling in and, if that's how you want to work, go ahead! I prefer to do it later.
There are basically two different ways of doing this securing - one is to use overcast stitch as seen above - just bring the needle up very close to the wire outside the shape and bring it back down again just inside, simply wrapping the wire whilst sewing it to the fabric thoroughly. Again, some might want to come up inside the shape and go down outside and you can, of course, do it that way too. I prefer this way around though so that I don't risk splitting and damaging any stitches inside the shape.
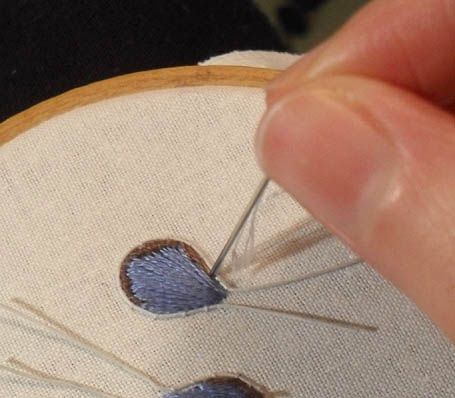
The other method is to work around the edge with buttonhole/blanket stitch - which hides any stray thread from the fabric a little better. Whichever stitch you chose, make sure you work individual stitches very closely together and completely cover the wire.
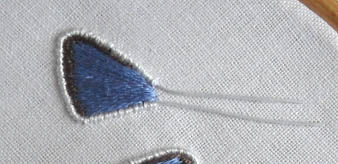
Here's our shape with the embroidery stitches all complete and secured with white overcast stitches.
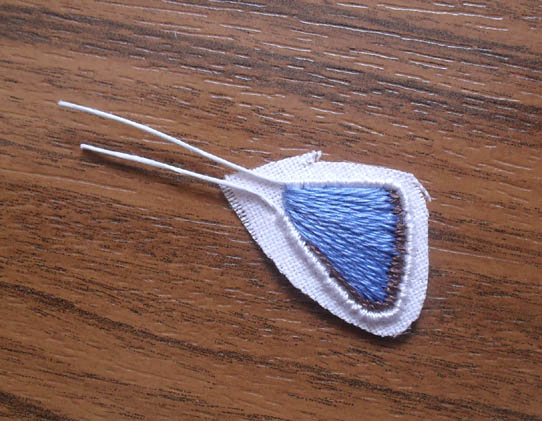
To cut the shape out, first go around it fairly roughly - just to detach it from the majority of the fabric it was worked on. After that, cut around it quite closely.
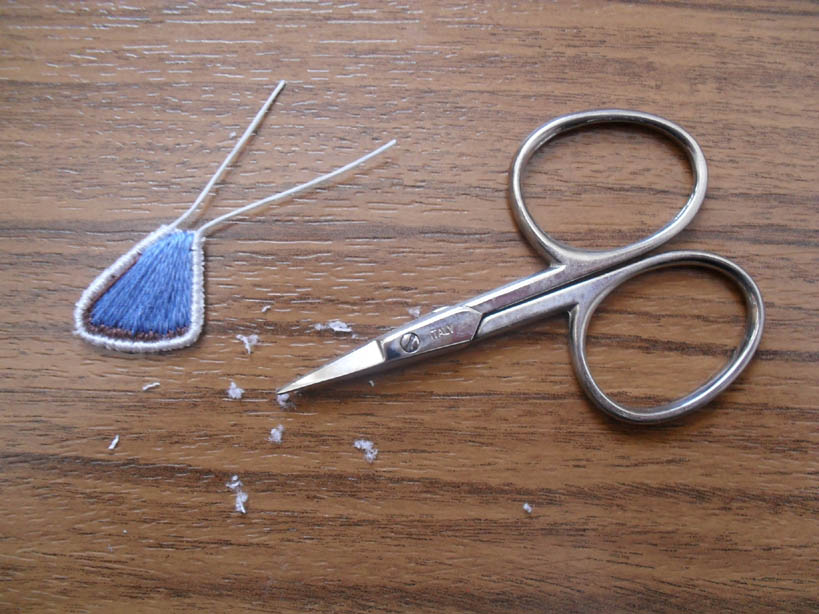
At this point, I switch to a very fine, sharp pair of scissors (these are my petit point scissors that I use for removing threads in drawn and cut work) and cut even more closely. When you think you're done, run your fingernail all along the edge of the shape and you'll find a few threads may stick up and you can trim them off quite easily.
If your edging is buttonhole/blanket stitch, you may find it easier to turn the shape over and cut the threads from the back. Often cutting at a perpendicular angle helps to protect the stitches. Cut as close as you can to prevent fabric showing. I've seen some otherwise lovely raised pieces spoiled by insufficient trimming and/or not using coordinating foundation fabric for the wired elements! White edges are not inevitable!
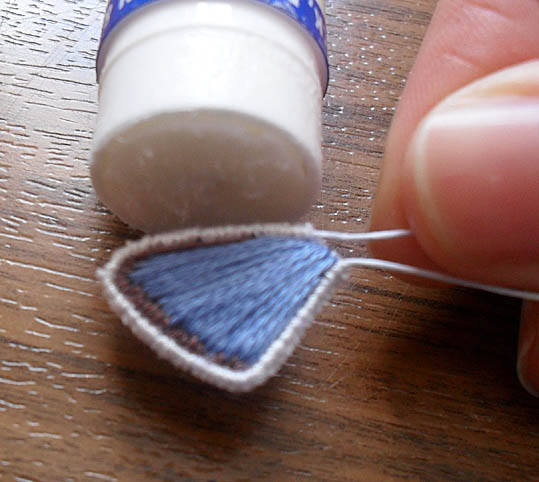
If, despite all cautions, you do snip a thread, all is not lost! Just go over it with a glue stick (like Pritt), rubbing lightly down around the cut edge. There are also products, such as Fray Check, on the market if you want to invest in something specialist for this sort of job. (Thanks for the tip, Marie!)
And that's it, your detached, wired element is ready to be joined to the rest of your piece.
Here are a few other uses for this type of shape:

I'm sure you can think of many more.....
Text and images: © Elizabeth Braun 2013


22 comments:
Anther excellent tute! Thanks Elizabeth.
Btw I am interested in the range of scissors you use, could you post a photo and description of them all some time?
Easy to follow tutorial and lovely examples of completed work
Beautifully worked and very clearly explained - good worked, Elizabeth!
I love your blog!
Excellent tutorial, thank you! I adore your stitching. It's elegant and beautiful.
Just a thought - a product like 'Fray Check' would work well too :)
Lovely work, and very good explanations.
Another thing I do is stick some masking tape over the ends of the wire while I am embroidering, that prevents the thread of getting caught up in the wires. xx
What I also do to prevent the white fabric showing is to use these fiber tip pens in a similar colour to the embroidery thread on the wire to colour those white fibers I could not get hold of.
Great tute, thank you.
Regarding fray check: I've read that it can yellow over time, so it may not be the best choice......
嗨!Elizabeth,非常謝謝你的這個教學,對我這完全初學者來說真是受益匪淺!judy
Great tute, thank you.
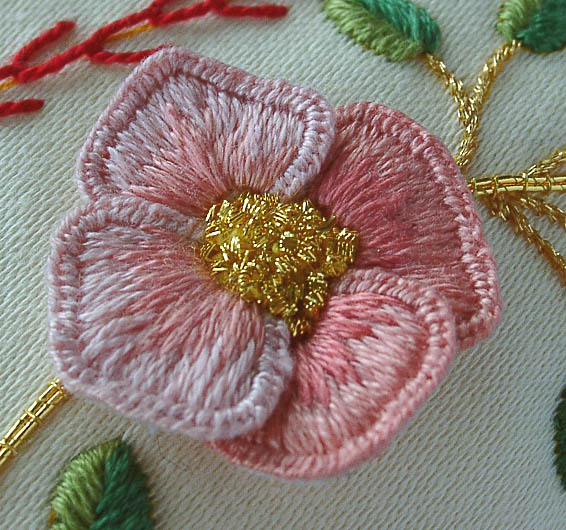
I love your flower; can you tell me what you used for the centre please?
BTW Elza, I haven't had great success with the felt pens: over time the colour changes (not just fades) and makes things look worse than if I had just left well alone. If you can tell me what I am doing wrong I'd be grateful. I used Tombow pens.
What an excellent tutorial! You make it seem so easy and intuitive--thank you!
Floozina: The dog rose centre is made of bright check pearl chips (goldwork stuff) over a bit of felt. Hope that helps.
I just found your blog through Craft Gossip and I have to tell you I just love your work, it is beautiful.
Thank you! It was great to see how you work. It had not occured to me to fill in first! I am going to try that. And, I love the bunny ear.
Beautiful work.
I LOVE that dragonfly. And I love learning how different people do this stump work technique. I've only tried it with the buttonhole stitching, but I like how the overcast looks--especially doing it last!
Your blog is really amazing! I stumbled upon it while looking for stumpwork tutorials. I have been doing ribbon embroidery for a long time and I like to free style too:) I also like the Hitchhiker's guide to the Galaxy and I also love languages:)Anyway...it would be great if we could talk more since we have lots in common. my e-mail is evyasa89@gmail.com God bless!!!
Absolutely beautiful!! I am in awe!
Hello
So how would you then attach the wing to the fabric? Is there another tutorial for that stage?
Thanks
Amy
Yes, check out the Tutorials page and look at the ones on assembling stumpwork flowers and bees. That should help.
=)
Cuidadosamente explicado al detalle, maravilloso trabajo Elízabeth te felicito.
Thank you for the tips . i am new to stump embroidery and i to try some thing new.
Thank you very much
stephanie pineau
Post a Comment