
Stumpwork Ladybird Tutorial
Today I have a tutorial for you helping you to create a ladybird (ladybug) in raised work. You can also vary the design, as you'll see at the end. The tute appeared in the spring 2012 edition of 'Crazy Quilt Gatherings', but I was disappointed to see that the photos and text got out of sequence in editing, with some text referring to incorrect photo numbers. If you saw that version and were confused, this should help clarify.=) Enjoy!

Cut an oval out of felt just a little smaller than half an inch or about one centimetre in length. Usually I would use the same colour as the base stitches, but this shows up better for photographic purposes.

Stab stitch the felt oval into place, normally using a matching coloured sewing thread. If you want to raise the bug’s body higher, then stab stitch a smaller oval underneath this one first.

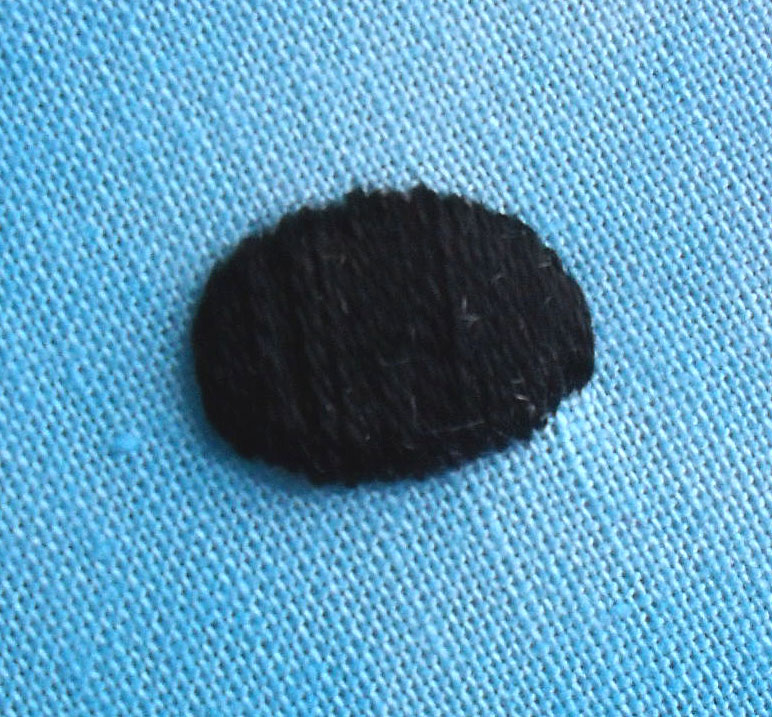
Begin to cover the whole of the body with a smooth layer of satin stitches in two strands of black cotton. Note that the stitches go across the body, not from head to ‘tail’. Below is the completed satin stitch.

Work three or four satin stitches across the top to form the head and then three or four more from just below the head to the back of the bug, fanning the stitches out very slightly. You need to work these stitches in black, they are done in green here for clarity on this photo only.

Beginning at the centre next to the long stitches, begin to work satin stitches in two strands of red stranded cotton (or a shinier rayon or silk thread, if you prefer), making sure that they sit smoothly over the body and that they fan out a little in order to cover the whole of the sides too. Below you can see the complete red thread work on the wings with the slight angle of the stitching showing. (Sorry this shot is a little blurred.)


Refasten on your black cotton and, taking care not to pull the stitches tight, work small horizontal seed stitches over some of the red threads (two at a time should be fine) to make the spots on the wings. Make sure both sides are similar.
Whilst you’re still working with black, and if you need to, work another stitch or two under the head area to cover any felt that may have become visible when stitching the red wings. I worked two, each going from the outside of the body to the centre forming a shallow ‘V’ shape.

With either plain black sewing thread or one strand of embroidery cotton sew on two black-based, regular sized seed beads for the eyes. You can use plain black, but I’ve used a slightly iridescent shade here for added interest and sparkle.

Add in the legs and antennae using one strand of a very fine thread working from one back leg around the front and head to the other back leg. The legs are worked in two straight stitches and one lazy daisy nearest to the body. I used Kreinik Cord 105C here, which is a silver and black mix.

Here is your completed ladybird/bug! Remember, you can make yours stand a little higher than mine by adding an extra, smaller oval of felt under the main one.
Variations

You can vary your bugs in a number of ways. The first is a miniature version of much the same bug but just about half the size. If you want to work one this small, remember to scale everything down including using petite beads for the eyes, one strand for wing spots, the finest thread you can find for legs, which you should also shorten a little, and don’t use extra padding for the body.

Here’s a 14 spot ladybird worked in a light tan stranded cotton and with extra wing spots.

This green leaf beetle’s iridescent wings were worked in two strands of Kreinik blending filament shade 085. As you might remember from the stumpwork beetle tute (which this whole tute is based on the technique from), you can also get a good effect with DMC Stranded Metallic in the emerald green shade.

This shining flower chafer was worked with Anchor Lamé thread – a 12 stranded, fairly smooth metallic. The cross-ways stitches from step 3 were worked in the same light tan shade used for the 14 spot ladybird.
Finally, here they all are together. You can see the difference in size between the regular and mini ladybirds very well in this shot.

I hope you enjoyed this tutorial.=) If you work a little bug of your own, please leave a link to it in the comments section below and share your success with everyone.
Text and images © Elizabeth Braun 2012


27 comments:
Thank you Elizabeth for very clear tutorial..will try for sure and link back when done..
Such a great tutorial. Thank you for sharing this with us, it is a real inspiration.
Deb
Such a lovely ladybird! Thank you for the tutorial :)
che belle coccinelle e che tecnica fantastico
Silvana
Too cute! Thanks for the tutorial, it was very well written and photographed. I love the variations.
Thanks for showing how this is done - seems logical to put felt underneath to pad it out but I would never have thought of that. I think I need to embroider a bug on something now....
Wonderful tute and so cute!
A very clear and careful tutorial, Elizabeth - well done. And the bugs are much more charming in stitched versions than I ever find them in real life!
謝謝妳!Elizabeth,
這個瓢蟲刺繡教學太棒了!
妳讓立體刺繡變得不再那麼難的遙不可及
希望大家都可以馬上動手試試
我要將這隻瓢蟲介紹給我的朋友:)
Thank you for the tutorial! judy
Lovely tutorial, must try this!
thanks for sharing this tutorial; your bugs are lovely
Thank you for sharing, dear.
I love your great blog.
Xoxo
Nina
Olá Elisabeth !
Lindo tutorial 1
Amei conhecer seu maravilhoso blog!
Beijos!
Sonia Faria - Brasil
Great Tutorial, Elizabeth. thank you for sharing!
Hello Elizabeth,
我真的感到非常的抱歉!如果你覺得照片應該取消,請一定讓我知道!也非常謝謝你提醒我,下一次我會先取得你的同意再做分享。ㄧ定是妳的瓢蟲太可愛了...哈!
願妳有美好的一天!!! judy
Vad underbara broderier!Jag har nyss upptäckt din blogg men den blir klart en av minna favoritter!
So cute bugs! I must try these soon. Thank you for the tutorial. I have done myself some cross stitch bug pillows for dolls house (pictures at my dollshouse blog www.pikkuista.blogspot.com). I don't know what is it with bugs, just love them :) Only yesterday I asked my friend to make me a ladybird carpet in 1:1 size. It would be nice on the floor beside my daughter's bed.
Beautiful ladybirds and a great, well written tutorial- I will be giving it a go, thank you!
i love ladybird!
I have just started to try stumpwork with the help of tutes..and this one is really great. The step by step explanation and the photos were very good. I will soon do it and post it in my blog. Thank you so much for sharing this.
mahaskills.blogspot.in
Dear Elizabeth, thanks for the tutorial! I love your ladybugs. So cute!!
erba
I am so looking forward to making some bugs...not really sure why I am so excited but I am ..thank you for a delightful tut.
Elizabeth-san thank you for your detailed description and photos.
JennyPennyPoppy just sent me over to this tutorial, and it is excellent, thank you! That last photo is priceless. :D
Do you know any tutorials for bees, in about the same scale? I have instructions for bees using bullions, but they don't feel quite right to me. Please let me know if you can think of any. Thanks!
HI, Elizabeth, I would like to ask for your permission to use your ladybird tutorial at the July meeting of our Embroiderers's Guild of America. I live in Georgetown, TX, and have been charged with a beginner stump work project. Your tutorial fits that assignment perfectly--the photos and instructions are very clear and easy to understand and perfect for a beginner project. I would, of course, give you credit. Thank you. Linda Connors (please email me back at calxrds@aol.com)
That was a very good tutorial. I will definitely try it. Thank you.
So cute, thanks for sharing! 💕
Post a Comment